Employment terms
Employment terms group the contract-level defaults that apply to employees: the work time norm, the flex account, timesheet approval and payroll period, and the policies, holiday calendars and reasons that target the terms.
Overview
When you assign an employment to employment terms, it gets the defaults configured on the terms, and every policy and holiday calendar scoped to those terms. This lets you manage rules for groups of employees in one place instead of configuring each employee individually.
The terms themselves set:
- Work time norm — the expected weekly working hours
- Flex account and hourly pay activity — see Work time
- Availability — which employments the terms can be assigned to, by work country and org unit
- Timesheet approval — whether and how timesheets are approved, and how they line up with payroll
- Default reason — the reason pre-selected when employees register time
Policies, holiday calendars and reasons are not picked on the terms. Each time off policy, allowance policy, work time policy, settlement policy, holiday calendar and reason has its own Availability section, where you can name the employment terms it applies to. See Policies below.
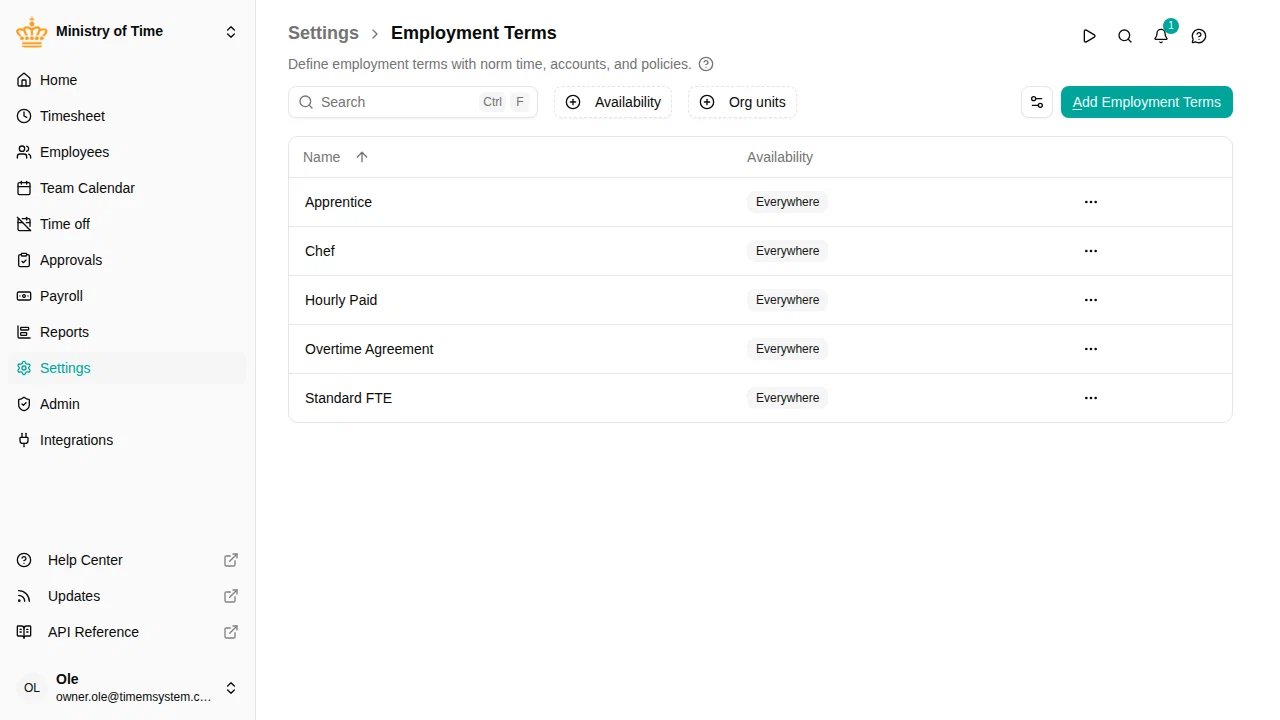
Manage employment terms
- Go to
- Use Add Employment Terms to create a new term
- Use row actions to Edit , Copy , view history, or Delete an existing term

Delete an employment term
Deleting a term does not change the configuration that points at it. Anything scoped to those terms — policies, holiday calendars, reasons, activities — keeps the reference, and shows it as Deleted employment terms in its Availability section instead of naming the term. Remove it there when the scope should no longer mention it, or restore the term within 30 days from to put everything back as it was.
Employees assigned to the term keep their assignment, so check them before deleting.
Configure an employment term
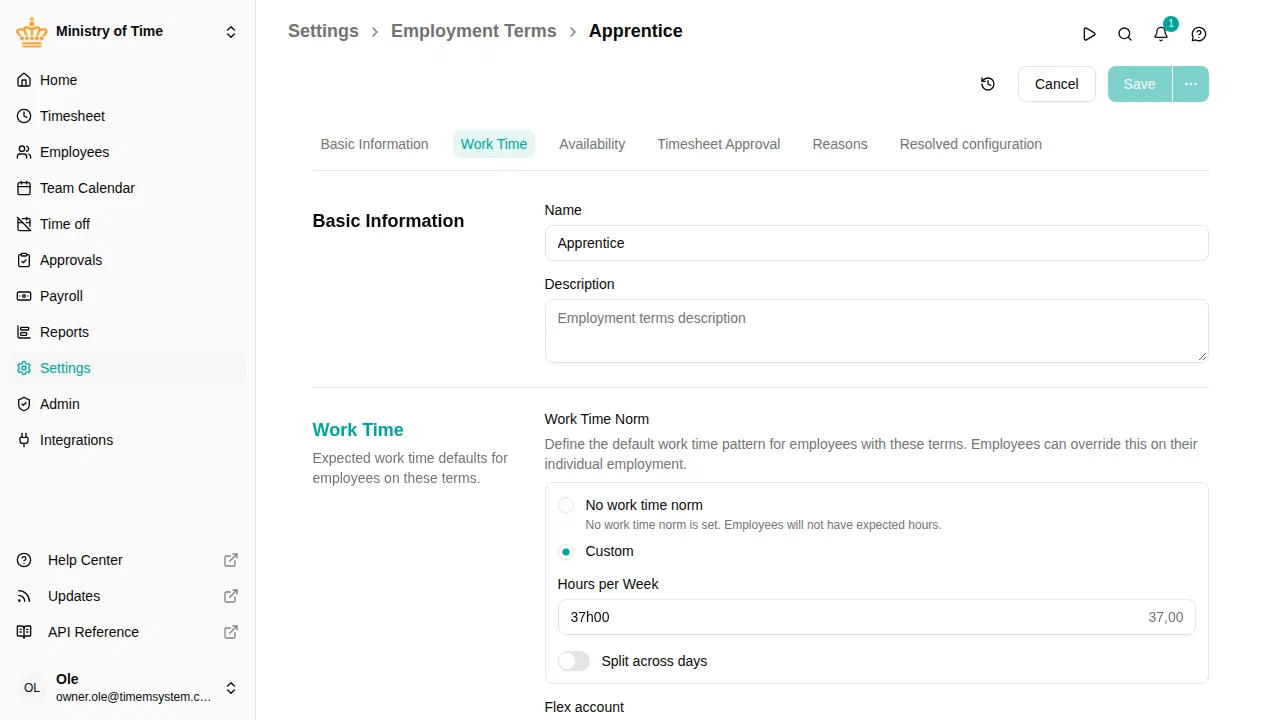
Click Add Employment Terms or Edit on an existing row to open the term editor.
Basic information
- Name — identify the term (for example, “Full-time” or “Part-time 30h”)
- Description — optional details about the term
Work time
- Work time norm — the default expected weekly hours for employees on this term

Policies
You don’t add policies to the term. Instead, open the policy (or holiday calendar) and, in its Availability section, choose Specific and add the employment terms it should apply to. The same policy can target several terms, and can also be narrowed by work country or org unit. Where several time off or settlement policies target the same account, the most specific match wins; allowance and work time policies all apply together.
To check the result, open the Resolved configuration section at the bottom of the term editor. Pick a work country and org unit, and it shows which time off policies, work time policies, allowance policies, settlement policies, holiday calendar, reasons and work time norm apply to an employment on these terms, and why each one matched.
| Configuration | Learn more |
|---|---|
| Time off policies | Time off policies |
| Allowance policies | Allowance policies |
| Work time policies | Work time policies |
| Settlement policies | Settlement policies |
| Holiday calendars | Holiday calendars |
Click Save when you are done.
Flex account
The Flex account setting names the time account that holds an employee’s flex balance — the running difference between worked and expected hours. It is the single answer to “which account holds this employee’s flex balance”, independent of how that account is fed.
- Choose a time account of type Time off measured in hours.
- Once set, the flex balance appears on the employee’s timesheet period card and dashboard, and on the account movements report.
- With just a flex account and no settlement policy, each period’s flex is carried forward automatically. Add a settlement policy only when you need premiums, caps, or payouts.
Hourly pay activity
The Hourly pay activity setting is for hourly paid employees: it names the allowance activity that represents their payable worked time.
- Choose any activity of type allowance (create one first under , e.g. “Hourly work”).
- Selecting it runs the Worked hours counter for that activity automatically — each day’s worked hours (time off excluded) appear on the activity’s row in the timesheet, on the open statement’s allowances, and on the dashboard, so employees watch their payable hours accumulate through the period.
- Selecting it here is exactly equivalent to creating a Worked hours allowance policy targeting the activity — one logic, two ways to switch it on.
- At statement approval the activity’s total is frozen on the approved period, and — when the activity carries a payroll integration’s salary code — reported as the employee’s salary. Re-approving a changed period reports only the signed difference; reopening alone reports nothing.
- Don’t also target the same activity with a manual Worked hours policy: policies stack, so the hours would be counted twice. The editor shows a warning when that happens.
Availability
The Availability section of the term limits which employments the term can be assigned to, by work country and org unit.
Timesheet approval
Configure whether employees must submit their timesheet for approval at the end of each period.
- In the term editor, find the Timesheet Approval section
- Choose an Approval Mode
:
- None — no approval workflow
- Employee only — employee submits, and the period auto-approves
- Manager required — employee submits, then a manager must approve or reject
- Choose the Payroll period
— the salary run your approval periods line up with:
- None — no payroll boundary; approval periods run as plain Mon–Sun weeks
- Monthly — set Payroll period starts on day . A period runs from that day to the day before the next one, so 20 gives 20 May → 19 Jun. Leave it at 1 for whole calendar months; in shorter months a later day falls back to the last day
- Fortnightly — set an Anchor date . Periods repeat every 14 days from it, continuously and with no yearly reset. Pick a Monday to get two whole weeks per period
- Choose the Approval frequency
:
- Whole payroll period — one approval per salary run
- Weekly — Mon–Sun weeks, with the week containing the payroll boundary shortened or extended so no period crosses it
- Click Save
See Timesheet statements for the full workflow (submit, reopen, multi-approver projects, admin overrides) and Approvals for the manager’s inbox.
Approval periods are always nested inside the payroll period and never cross it. So on salary-run day every approval period in the closed payroll period is complete and ready to approve — which is why there is no separate approval deadline to configure.
A leftover run of fewer than three days never becomes a period of its own: it is absorbed into the neighbouring week, so a stray two-day period never appears.
Work time norm
The work time norm determines how many hours per week an employee is expected to work and how those hours are distributed over the days of the week. You can also define norms that span several weeks, for example to handle alternating schedules. The system resolves the norm using three layers, checked in this order:
- Employment override — a value set directly on an individual employment (highest priority)
- Employment terms default — the value configured on the term assigned to the employment
- Workspace standard weekly hours — the organization-wide baseline
The system uses the first value it finds. This means most employees use the terms default, and you only set an employment override for exceptions like part-time contracts.
Entering norm values
You can type the weekly value as decimal hours (for example, 20 or 29,6) or as hours and minutes (for example, 20:00 or 29h36), matching your time-format preference — the other format is shown greyed beside it, and on the week and total lines.
Contract hours are always stored to the minute, which is why the day-by-day cells show hours and minutes only: a per-day decimal is usually a rounded view of the stored minutes, so a day of 7h40 would read 7,67 even though it is really 7,666… hours. See Hours & minutes vs decimal hours for why we recommend defining norms in whole minutes.
Set workspace standard weekly hours
This is the full-time baseline for your organization and is used for FTE calculations.
- Go to
- In the General Settings section, find Standard Weekly Hours
- Enter the full-time weekly hours (for example, 37:00)
Set terms default norm
- Go to
- Open an existing term or create a new one
- In Work Time , select Custom under Work time norm, then enter the weekly hours under Hours per Week
- To vary the hours by day, turn on Split across days
. The weekly total is spread evenly across the working days. From there you can:
- Click a day name to include or exclude it — the total re-spreads across the remaining working days (excluded days appear struck through)
- Type directly into a day to set uneven hours
- Use Distribute evenly to reset to an even split
- Click Save

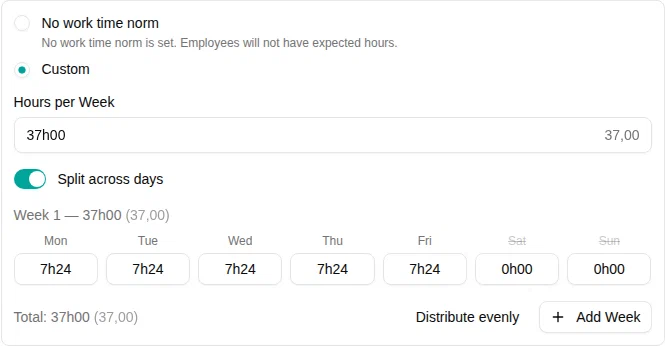
All employees assigned to this term will use this value unless they have an employment-level override.
Rotations over several weeks
Some contracts repeat over more than one week — for example working Monday to Thursday one week, then Monday plus Wednesday to Friday for the next three. In the day split, use Add Week to add the weeks of the rotation.
Pattern start decides which real week is Week 1:
- Leave it empty and the rotation starts in the employee’s first week of employment — the field shows that date as a hint.
- Set a date and the rotation starts in that week instead.
- To put several employees on the same rotation, set the same pattern start on the employment term (or work time policy) they share. Left empty on a shared norm, each employee’s rotation starts in their own first week, so colleagues who started in different weeks end up on different weeks of the pattern.
Each week heading lists the first weeks it falls on, so you can check the rotation lines up before you save.
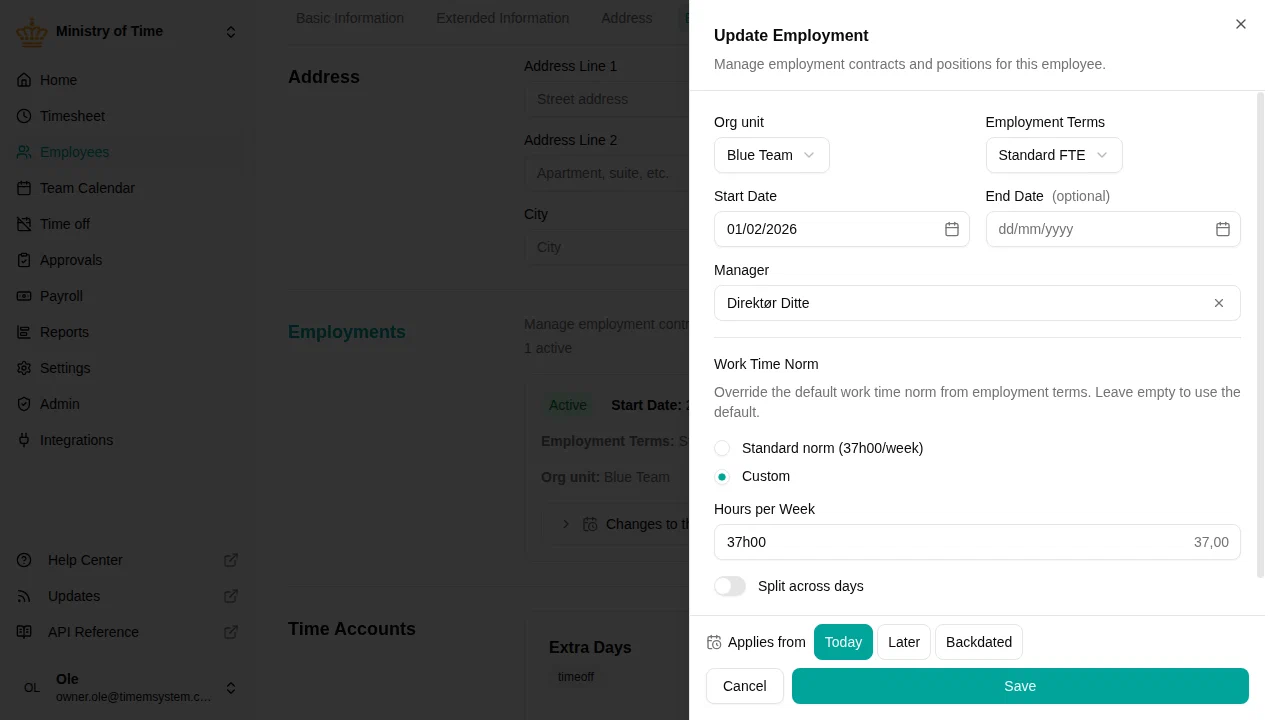
Override norm on an individual employment
Use this only when an employee’s weekly hours differ from the terms default.
- Go to
- Open the employee profile
- In Employments, edit the relevant employment
- Select the correct Employment terms
- Under Work time norm, choose Custom (rather than Standard norm, which keeps the inherited default) and enter the override value. Turn on Split across days if the hours vary by day.
- Click Done , then Save on the employee profile