Custom attributes
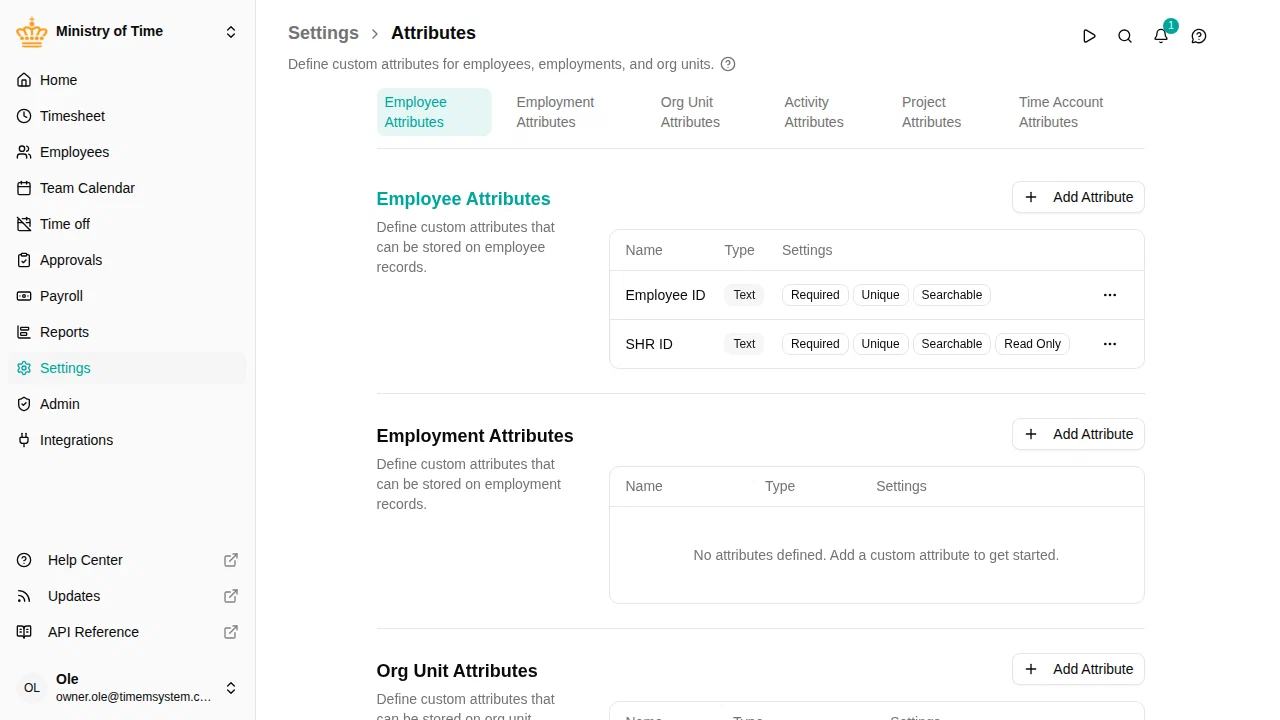
Add custom attributes to store additional information about your employees, employments, org units, activities, projects, and time accounts.

Overview
Custom attributes let you capture information that isn’t covered by the standard attributes. Common examples include:
- Badge numbers or employee ID numbers
- Department codes for reporting
- Team types (department, project team, etc.)
- Contract details specific to your organization
Standard attributes
Before you create your own, look at the standard attributes. When you click Add Attribute you can pick one under Common Attribute instead of defining a new one. mTime and its integrations already know these, so a payroll system understands what “Payroll Number” means — it would not understand a key you invented yourself.
| Standard attribute | Available for | Use for |
|---|---|---|
| Social security number | Employees | CPR or national identity number |
| Payroll number | Employees | The employee’s number in your payroll system |
| Employment number | Employments | The contract’s number in your payroll system |
| Title | Employments | Job title |
| Account reference | Org units, activities | The general ledger account to book to |
| External ID | All areas | The record’s identifier in a system you connect yourself |
External ID
Use External ID when you connect mTime to a system of your own and need to tell which record is which on both sides — for example a project in mTime and the same project in your finance system.
It is available for every area, so you can record the identifier on employees, employments, org units, activities, projects and time accounts. On employees mTime also checks that no two employees have the same External ID. On the other areas the value is stored without that check, so keep the values unique yourself.
Where you can add custom attributes
You can create custom attributes for these areas:
| Area | Use for |
|---|---|
| Employee attributes | Personal details stored on each employee’s profile |
| Employment attributes | Information about one employment (helpful when someone has multiple positions) |
| Org unit attributes | Additional details about org units |
| Activity attributes | Extra details on work activities (displayed and searchable in the activities table) |
| Project attributes | Extra details on projects |
| Time account attributes | Extra details on time accounts (such as vacation or flex) |
Attribute types
When creating an attribute, choose the type that fits your data:
| Type | What it stores | Examples |
|---|---|---|
| Text | Any text | “Building A”, “EMP-12345” |
| Number | Numbers | 42, 3.14 |
| Yes/No | A simple on/off choice | Yes or No |
| Date | A calendar date | 2025-01-15 |
| Selection | A dropdown list you define | “Full-time”, “Part-time”, “Contractor” |
Creating custom attributes
- Go to
- Find the section for the type of attribute you want to add:
- Employee Attributes for personal details
- Employment Attributes for information about one employment
- Org Unit Attributes for org unit details
- Activity Attributes , Project Attributes and Time Account Attributes for those records
- Click Add Attribute
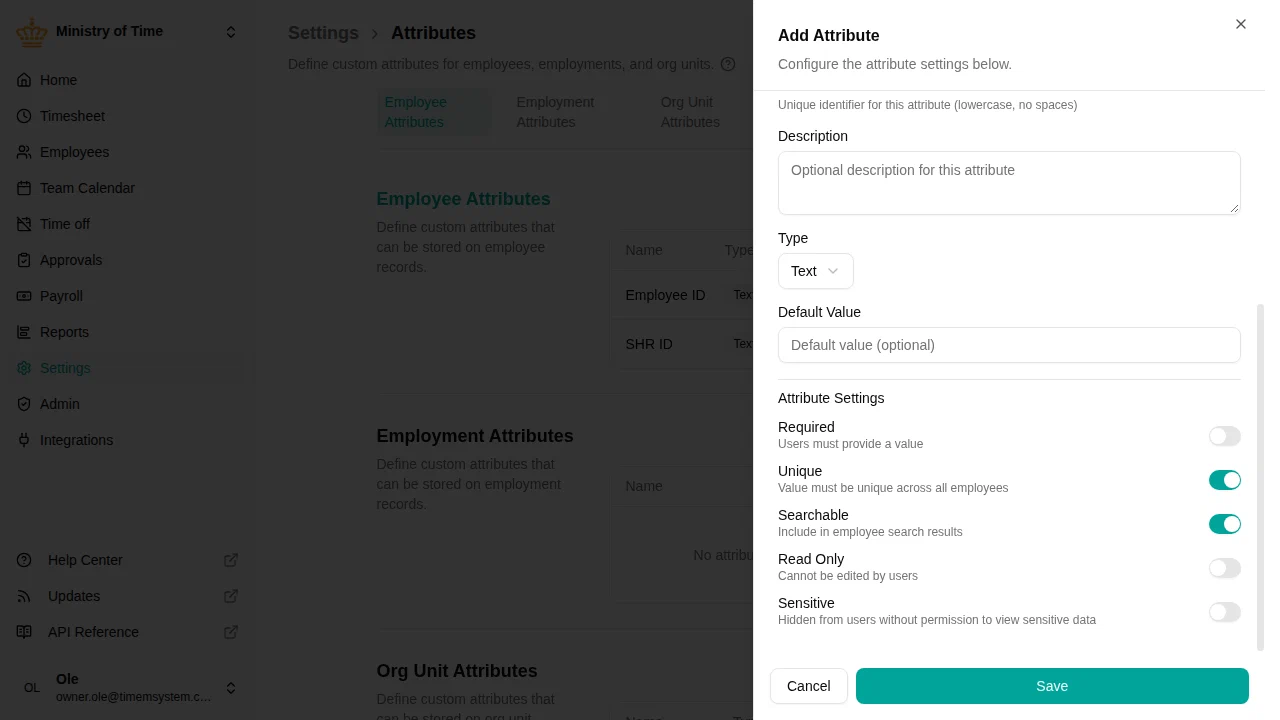
- Fill in the details:
- Name: The label users will see
- Key: A short identifier (created automatically from the name)
- Description: Optional help text to explain what this attribute is for
- Type: Choose from Text, Number, Yes/No, Date, or Selection
- Configure any additional options (see below)
- Click Save

Attribute options
Required
When turned on, this attribute must be filled in. Users won’t be able to save without providing a value.
Unique
Ensures no two records can have the same value. This is useful for:
- Employee ID numbers
- Badge numbers
- External reference numbers
If someone tries to enter a value that’s already in use, they’ll see an error message.
Searchable
Makes this attribute’s values findable through search. When turned on, you can search for employees by their attribute values.
For example, if you have a searchable “Badge ID” attribute with value “A-1234”, searching for “A-1234” will find that employee.
Read-only
The setting is called Read Only . It prevents users from changing the value. This is useful for:
- Information imported from other systems
- Values managed by integrations
- Reference numbers that shouldn’t be changed
Read-only attributes can still be updated through imports or integrations.
Sensitive
Hides the value from users who don’t have permission to view sensitive data. Use it for details such as a national identity number.
Editing attributes
Deleting attributes
Where custom attributes appear
Once you’ve created attributes, they automatically show up in the right places:
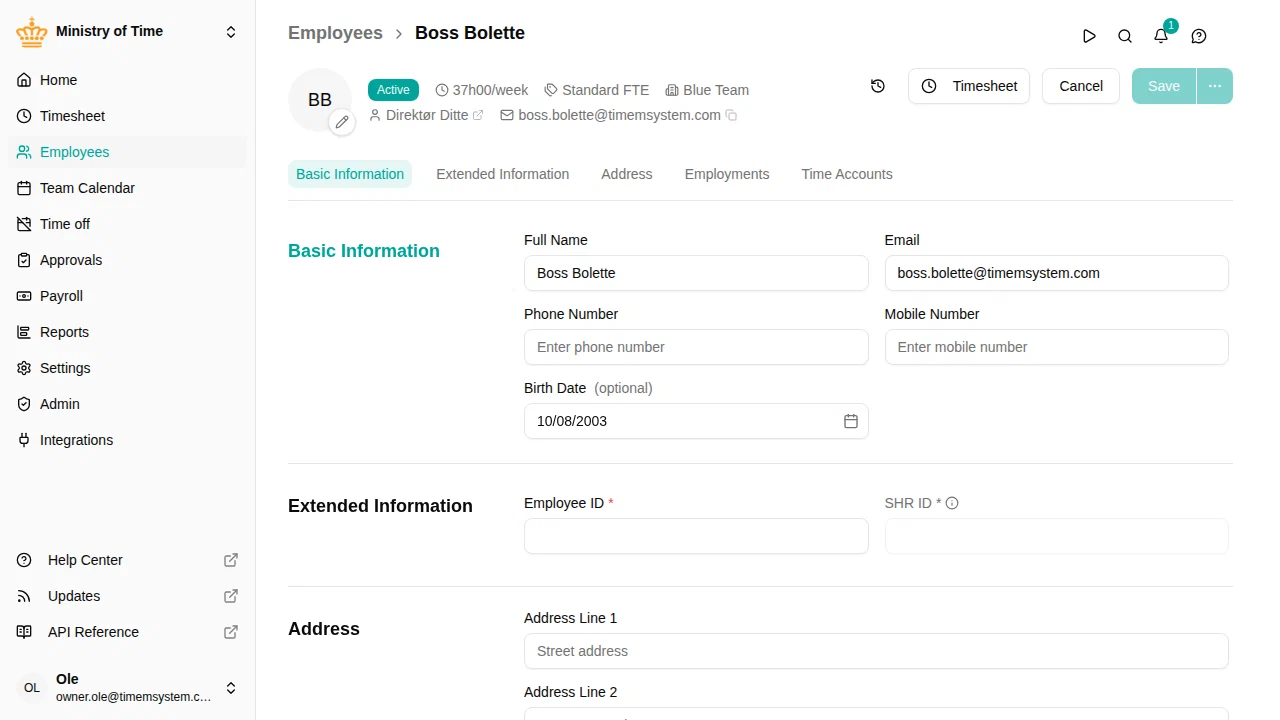
- Employee attributes: In the “Extended Information” section when editing an employee
- Employment attributes: When creating or editing an employment
- Org unit attributes: In the “Extended Information” section when editing an org unit

Attributes from integrations
If you use integrations (like VOM or SHR), they may add their own attributes. These work a bit differently:
- They appear in their own section, named after the integration
- You cannot edit or delete them in mTime
- They are managed by the connected system
- They may be read-only
Creating a dropdown list
For Selection type attributes, you define what options appear in the dropdown:
- When creating or editing the attribute, choose “Selection” as the type
- In the Options field, type each option separated by commas
- Example:
Full-time, Part-time, Contractor, Intern
Users will see these choices in a dropdown menu.
Troubleshooting
| Problem | Solution |
|---|---|
| Attribute doesn’t appear | Refresh the page and check that it was saved |
| Can’t save because value is already used | The attribute has Unique turned on; use a different value |
| Can’t edit an attribute | The attribute has Read-only turned on; an admin can change this in the attribute settings |
| Search doesn’t find the value | Turn on Searchable for the attribute; it may take a moment to update |
| Can’t change the key | Keys can’t be changed; delete and recreate the attribute if needed |