Team calendar
View your team’s time off schedule at a glance and approve pending requests.

Overview
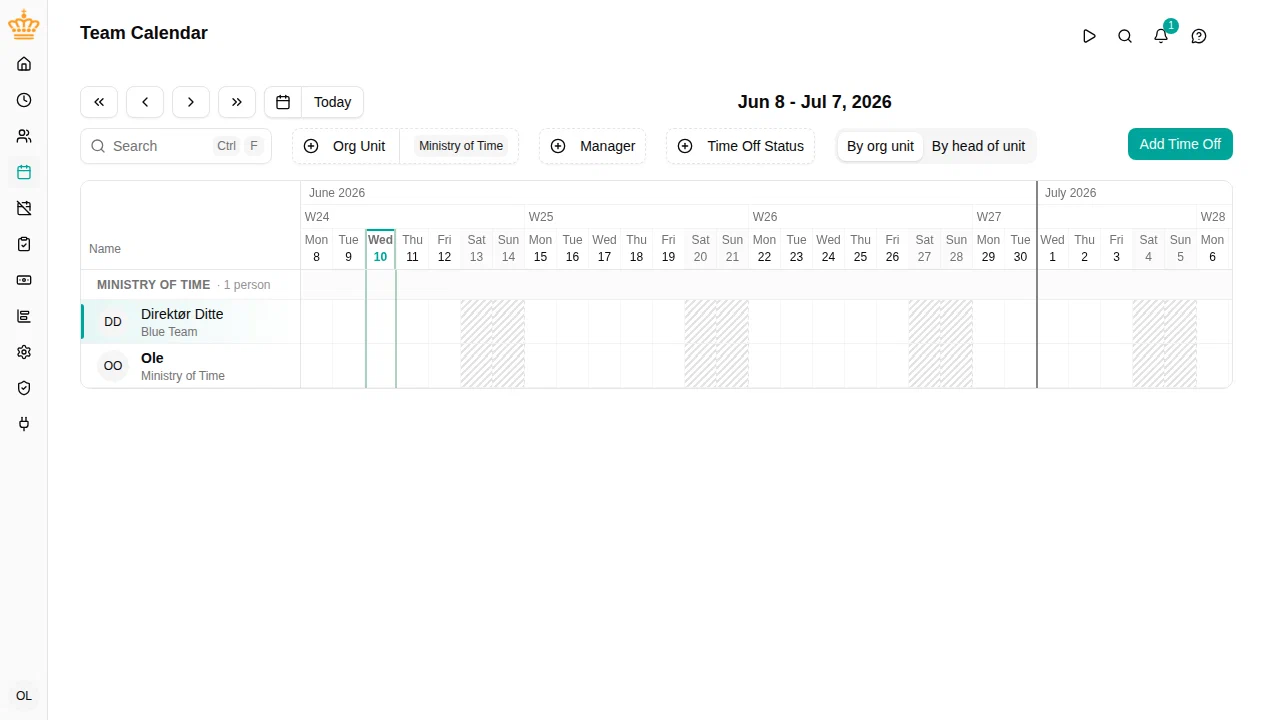
The Team Calendar gives managers and administrators a visual overview of employees’ time off. It shows planned and pending absences on a timeline, allowing you to:
- See when team members are away
- Identify scheduling conflicts
- Approve pending time off requests
Accessing the calendar
Navigate to in the sidebar.
What you see
The calendar displays employees as rows with their time off periods shown as colored bars on the timeline. The color comes from the category of the time off type, which is set on the activity under , so the same kind of absence has the same color in every workspace and every language:
| Color | Category |
|---|---|
| Blue | Vacation |
| Rose | Sickness |
| Violet | Personal |
| Teal | Time off in lieu |
| Orange | Parental leave |
| Grey | Other, and time off without a category |
The colors are fixed. They can’t be changed per workspace or per user. Fix a wrong color by giving the activity the right category.
The status never changes the color, only the bar’s style:
- Approved time off is a solid bar.
- Pending time off (awaiting approval) is an outlined bar with a dashed border in the same color, and a clock icon.
A key under the calendar lists the colors on screen. Weekends, public holidays and days someone doesn’t work stay grey.
Each bar shows the type of time off (for example, “Vacation” or “Sick leave”) and its duration. On narrow bars, click the bar to see the details.
Filtering the view
Use the filters above the calendar to narrow down what you see:
- Search — Find employees by name
- Org Unit — Show only employees from specific departments
- Manager — Show only employees reporting to specific managers
Click Reset to clear your filters and return to your default view.
Display options
The gear button Display , next to the Auto , 3 months and 6 months buttons, holds the settings you change less often:
- Group by — Group the rows by organization unit or by head of unit
- Time Off Status — Show only planned time off, pending time off, or both
A dot on the gear means a status filter is on. Reset clears it along with the other filters.
Choosing your default view
When you open the calendar without any filters, it shows your own team: your direct reports if you are a manager, otherwise your own organization unit. If you regularly follow other units, star them to make them your personal default:
- Open the Org Unit filter
- Point at a unit in the list — a star appears at the end of the row (on a phone, the star sits at the end of each unit chip in the filter panel)
- Click the star
From then on, the calendar opens with your starred units whenever you haven’t filtered anything yourself, and Reset takes you back to them. Starred units also move to the top of the filter list so they are easy to find.
Your stars are saved with your user account, so they follow you across devices and browsers. Each workspace has its own set.
Starring a unit does not change what you are currently looking at — it only changes what the calendar shows by default. To go back to the standard view, remove all your stars.
Following the units you care about
Click the star next to an Org Unit to follow it. Starred units become your default view: they are back the next time you open the calendar, on your computer as well as your phone.
Your own unit always comes first — both in the filter list and among the calendar rows — so your own team stays at the top however many units you follow.
Navigating the timeline
- Use the ← and → buttons to move backward or forward in time
- Click Today to jump to the current week
- On the keyboard, press ← and → to step a week at a time, and T to jump to today. If you have just used a filter, press Escape first to leave it
Showing a longer period
Use the Auto , 3 months and 6 months buttons in the toolbar to choose how much of the calendar fits on screen. Auto is the default view: it shows as many days as fit your window at full size. The longer periods squeeze the days to fit your window, and the header then shows months and week numbers instead of individual days.
The calendar remembers your choice in your browser. The period is also part of the page address, so a link you share opens with the same view.
At 3 months and 6 months a day is too narrow to click precisely, so clicking an employee’s row opens that week in a popup instead. The popup shows the seven days at full size with the employee’s time off. Click a bar to open it, or click or drag over free days to request time off for those days.
Approving time off requests
If you have permission to approve an employee’s time off, pending requests will show an Approve button when you hover over them.
- Hover over a pending (outlined) time off bar
- Click Approve in the tooltip
The time off is immediately approved and the bar turns solid.
Changing or ending someone’s time off
If you are allowed to change an employee’s time off — administrators for everyone, managers for the employees they manage — you can do it straight from the calendar.
- Time off that has not started yet, or is still waiting for approval: click the bar to open the time-off form, change the dates or type, and save.
- Time off that is under way, for example an open-ended sick leave: click the bar and choose Interrupt Time Off , then confirm with Yes, Interrupt . The absence ends today — an open-ended absence is closed with yesterday as its last day — and days already taken stay on record.
If your organization requires approval for changes to approved time off, the change is sent for approval instead and the bar stays until it is decided.
Creating time off from the calendar
Managers and administrators can create time off requests directly from the calendar:
- Drag across day cells on an employee’s row to select a date range
- The time off request form opens, prefilled with the employee and selected dates
- Complete the request and submit
You can also click Add Time Off in the toolbar to create a request without selecting dates first. The form opens on the month the calendar is showing, with no dates chosen and your accounts already listed — so scrolling the team calendar to August and clicking it asks about August, not about today.
The drag-to-create action only appears on rows where you have permission to create time off requests for that employee.
Clicking a day that already has time off opens that time off instead of starting a new request.
Child dates on the calendar
When a leave type depends on an expected or newborn child — the weeks before a due date, leave after a birth, a child’s sick day — the dates that decide it are marked on the calendar with a small baby icon: in a dashed pink outline for an expected birth (the due date), in a solid one for a child born (the confirmed birth date). Click a mark to see whose birth it is and on which date; the legend under the calendar names both. You see them on every row you may register time off for, and on the request form you open from it, so you can book around them without looking up the employee’s record first. The employee sees the same marks on their own row and form.
A type refused for the chosen dates says which date it was judged against — for example that it opens four weeks before the due date on a given day, or that the window after a birth closes on a given date.
Using the calendar on your phone
On a phone, the Team Calendar is one tap away: the bottom menu shows a Team button whenever you have access to the calendar. (For approvers with items waiting for a decision, that spot shows Approvals until the inbox is empty.)
The calendar itself swaps the timeline for three views made for small screens. Switch between them with the Day , Week , and Month buttons at the top.

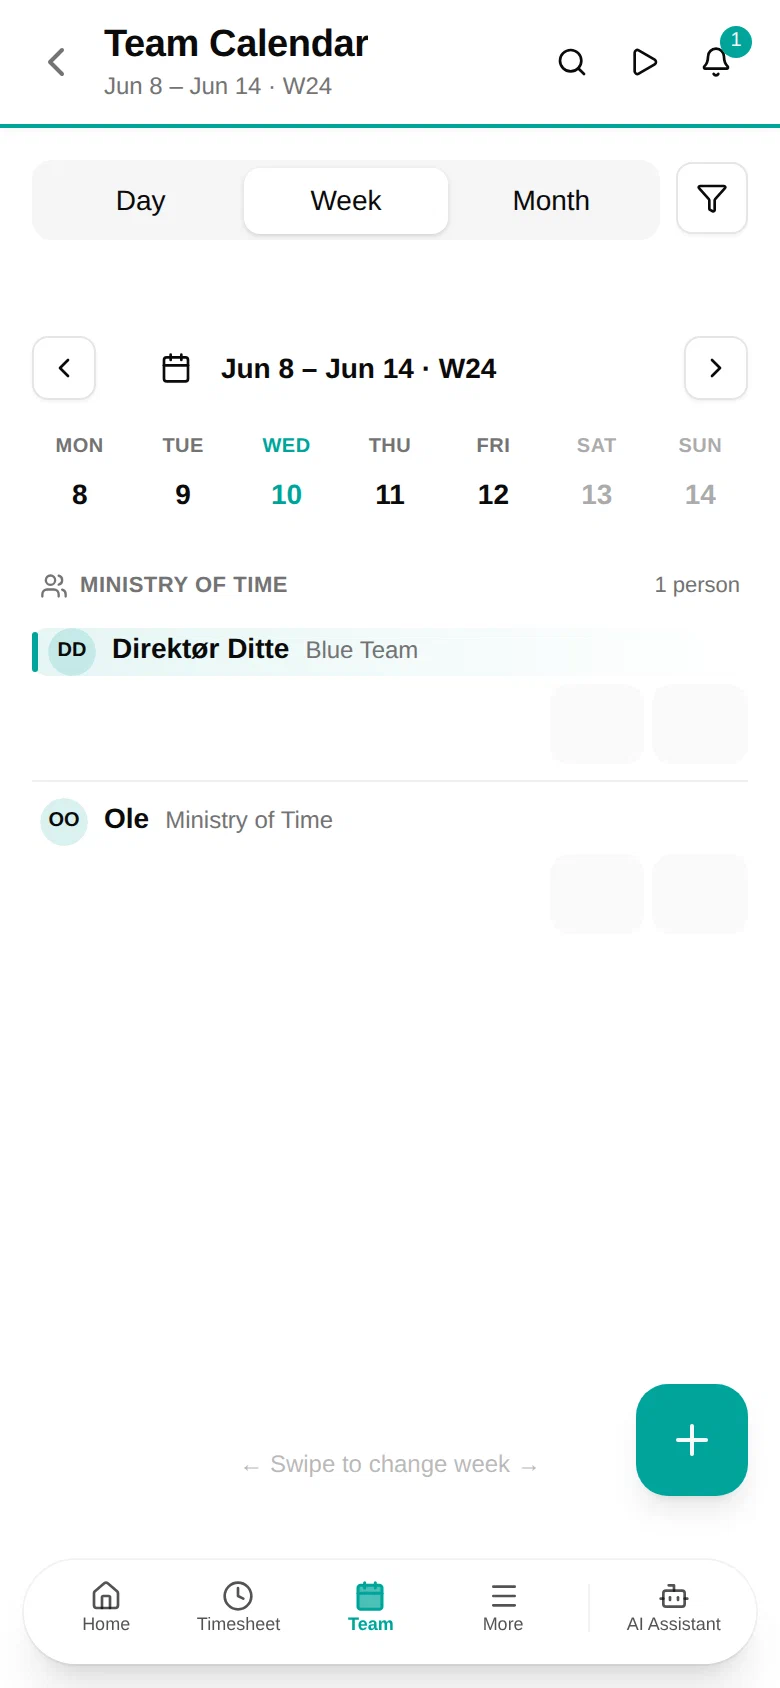
- Week shows each team member with their own seven-day row. Tap a colored bar to see the details and, if the request is waiting for a decision, approve or decline it. Tap an empty day on someone’s row to register time off for them starting on that day.
- Day answers “who is away today?” — it lists who is away, which requests are waiting for your decision (with Approve and Decline right on the card), and who is in.
- Month shows the whole month with colored dots for each person away on a day. Tap a day to see who is away and to add time off on that date.
The colored chips above the calendar show which time off types occur in the period you are viewing, with a count of people per type. Tap a chip to show only that type; tap it again to show everything again. Public holidays in the period are listed beneath the calendar.
To move around, swipe left or right, use the arrow buttons, or tap the period label to jump straight to another month. The Today button appears whenever you have navigated away from the current date. Use the round + button in the corner to request time off for yourself.
Time off type visibility
By default, the calendar shows the type of time off (for example, “Vacation” or “Sick leave”) only to users with sensitive time off read permission. Regular users still see the period bar, duration, and status, but the label shows a generic “Time off” instead of the specific type, and the bar is grey rather than the type’s color, so the color gives nothing away either.
This protects employee privacy while still giving team members visibility into availability.
Who can see what
The Team Calendar respects your organization’s access rules:
- HR Administrators see all employees
- Managers see employees who report to them (directly or through the organization hierarchy)
- Org unit heads see employees in their unit and sub-units
Employees who have left stay on the calendar only for the dates they were employed. Once the calendar starts after their last working day, their row is gone — scroll back to when they worked and it returns. Someone who is still working out their notice keeps their row until their last day has passed.
If you don’t see an employee you expect to see, check that:
- The employee has an active employment
- You have the appropriate role to view that employee