Presets
Save a report’s whole setup under a name, apply it again in one click, and share it with colleagues.

Overview
Most reports are run again and again with the same setup: the same period, the same departments, the same grouping. A preset saves that setup under a name so you don’t have to rebuild it every time.
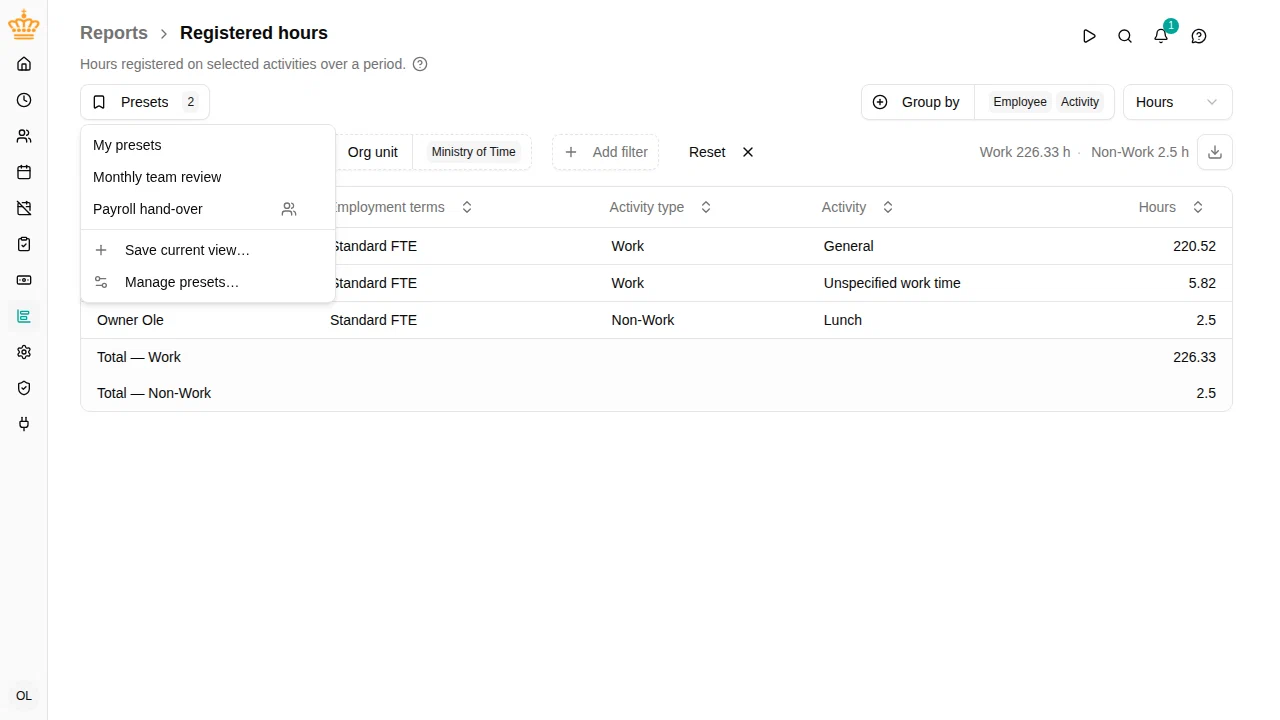
Every report has a Presets button above its filters. It shows the name of the preset you are currently looking at, or just Presets with the number of saved presets when none is applied.
Presets belong to the report they were saved from: a preset saved on Registered hours doesn’t appear on Sickness , because the two reports are configured with different things.
What a preset captures
A preset stores the complete view — everything you can change on the page:
- The Period
- The common filters: Org unit , Manager , Employment terms
- The report’s own filters, for example Activity on Registered hours or the accounts on Account movements
- The report’s view controls: Group by , the hours/days unit, and settings such as the sickness report’s Spell settings
Periods are saved as what you picked, not as fixed dates. A preset saved with Current month still shows the current month next year — it is worked out again from today’s date every time you apply it. Only a hand-picked Custom range keeps its exact dates, because there is nothing relative to remember.
Saving the current view
- Set up the report the way you want it — period, filters, grouping, unit
- Click Presets and choose Save current view…
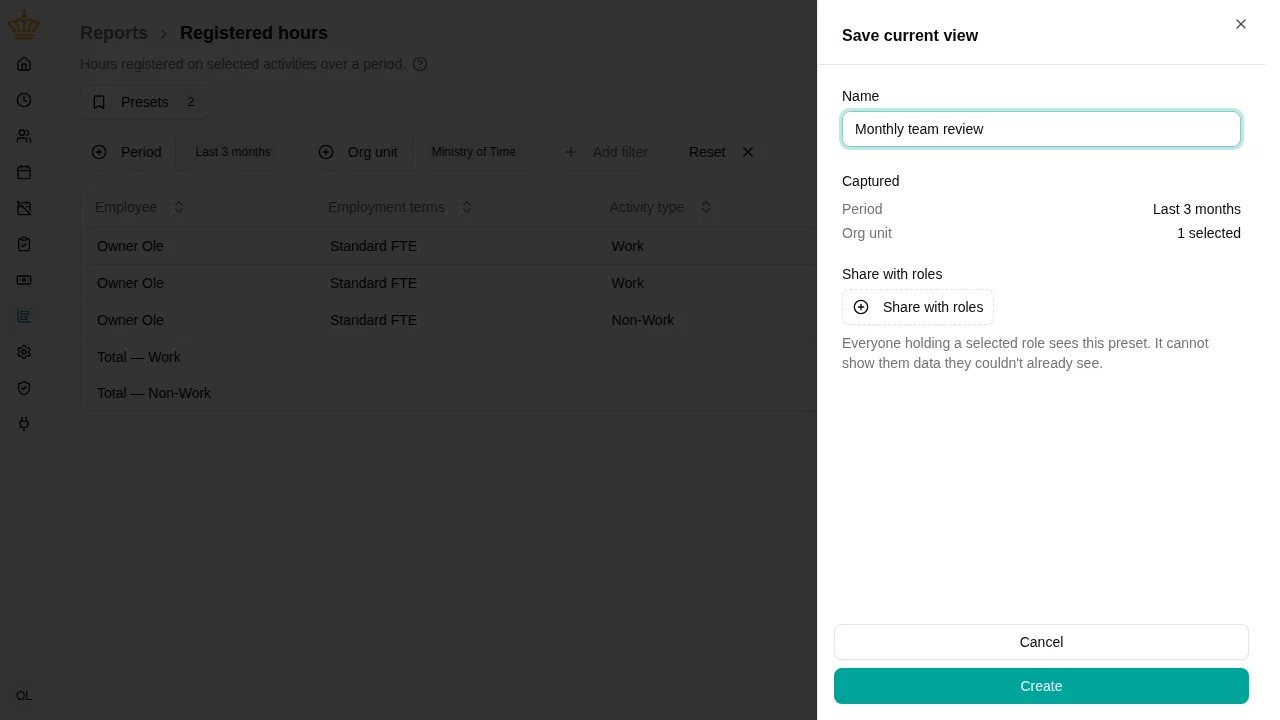
- Give it a name, for example “Monthly team review”
- Optionally share it with other roles (see Sharing)
- Click Create
The Captured list in the panel summarises what you are about to save, so you can check the period and filters before naming it.

Applying a preset
Open the Presets menu and click a name. The report reloads with that setup, and a check mark marks the applied preset.
Applying a preset changes the page address too, so you can copy the link from your browser and send it to a colleague — they see the same view, narrowed to the employees they are allowed to see. The Excel export follows the applied preset as well.
If you then change a filter, a dot appears next to the preset’s name to show the view no longer matches what was saved. You can either leave it (nothing is stored until you say so) or update the preset:
- Open the Presets menu and click the update entry, which names the applied preset, to overwrite it with what’s on screen
- Or choose Save current view… to keep both, as a new preset
Opening a report with a preset
Star a preset to make it your default for that report:
- Open the Presets menu
- Point at the preset and click the star (or open Manage presets… , where the stars are always visible)
From then on, going to that report applies the starred preset straight away. One star per report — starring another one replaces it. Click the star again to go back to the report’s own defaults.
The star is personal, even on a shared preset: starring a preset your administrator shared with you changes only your default view, nobody else’s.
A starred preset only applies when you open the report normally. Follow a link that carries its own filters, or come back to a report you were just working in, and what you were looking at wins.
Sharing a preset with colleagues
Presets can be shared with roles rather than with individual people, so a new manager automatically gets the reports your organization runs.
In the save or edit panel, pick one or more roles under Share with roles . Everyone holding one of those roles finds the preset in their own Presets menu, under the shared presets, marked with a people icon that names the roles it went to.
Only the roles that can actually open reports are offered, so a preset is never shared with people who would never see it.
Sharing is an administrator action by default. Other roles see the Share with roles section but cannot use it — their presets stay personal. If you want managers to share presets too, add the report / share permission to their role under .
A preset you leave unshared is personal: only you see it, and it is removed along with your other personal data when your employee record is deleted. Shared presets stay, and any administrator can manage them — so the reports your organization depends on don’t disappear with the colleague who first set them up.
Managing presets
Choose Manage presets… from the Presets menu to see everything saved on this report, split into My presets and Shared , with the roles each shared preset went to.

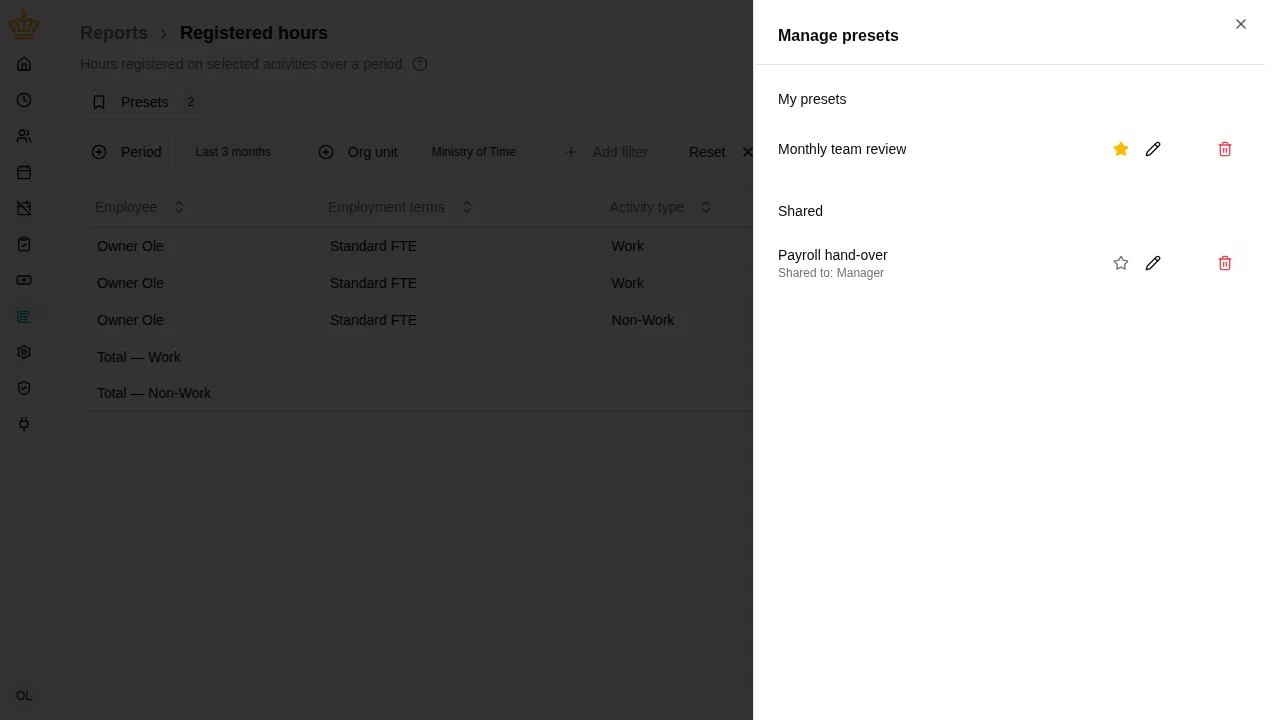
Each row offers:
| Action | What it does |
|---|---|
| Star | Open this report with this preset (your own default) |
| Edit | Rename it, or change which roles it is shared with |
| Update from current view | Overwrite its setup with what’s on screen — offered for the preset you have applied |
| Delete | Remove it |
You can always manage your own presets. A shared preset can also be managed by administrators, who see the edit and delete actions on it; for everyone else it is read-only — it can be applied and starred, but not changed.
Deleting a shared preset removes it for everyone holding the roles it was shared with, and the confirmation says so. Presets are cheap to recreate, though: nothing in your time data depends on them.