Scheduled and retroactive changes
Plan future changes to your organization structure and policies, and apply changes retroactively when needed.
Overview
mTime lets you schedule changes to take effect on a specific future date, or apply changes retroactively to a past date. This is useful when:
- Upcoming reorganizations — Schedule org unit changes to go live at a future date
- Policy updates — Set new time-off or allowance policies to activate at the start of a period
- Employment changes — Update employment terms with a future effective date
- Corrections — Apply retroactive changes to fix historical data
Scheduled changes work with:
- Organization units
- Employees
- Employment terms
- Time-off policies
- Allowance policies
Scheduling a change
To schedule a change for a future date:
- Open the entity you want to change (organization unit, employee, policy, etc.)
- Make your changes in the form
- Click the dropdown arrow next to Save
- Select Schedule for later


- Pick the effective date from the calendar
- Click Schedule change

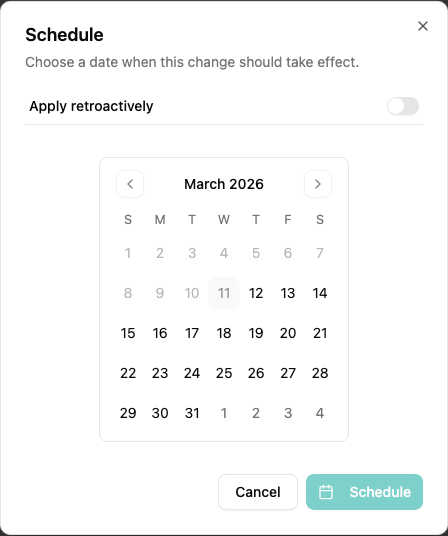
The change is saved but won’t take effect until the scheduled date.
Viewing scheduled changes
When an entity has pending scheduled changes, a calendar icon appears in the header.


Click this icon to open the version history drawer, which shows:
- Scheduled changes — Future changes waiting to be applied
- History — Past changes that have already been applied

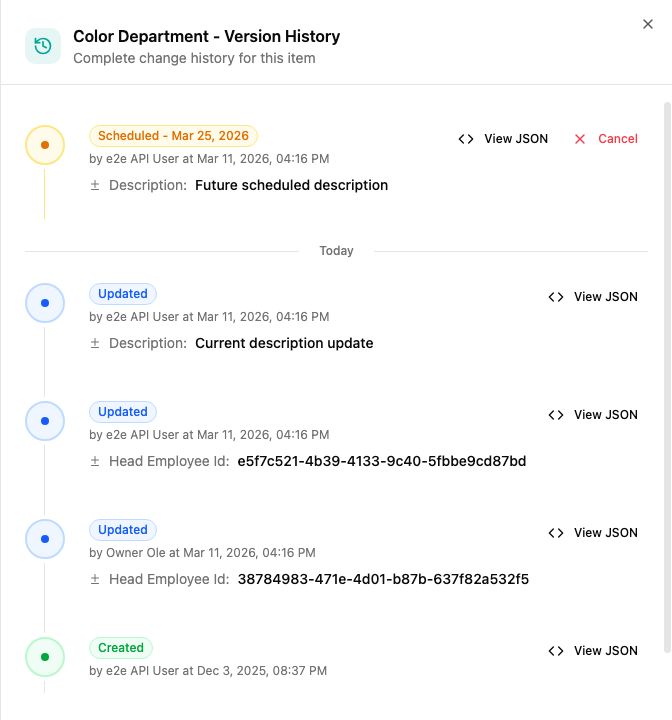
Each entry shows:
| Detail | Description |
|---|---|
| Status | Scheduled (future) or Updated/Created (applied) |
| Effective date | When the change takes effect |
| Changed by | Who made the change |
| Created at | When the change was created |
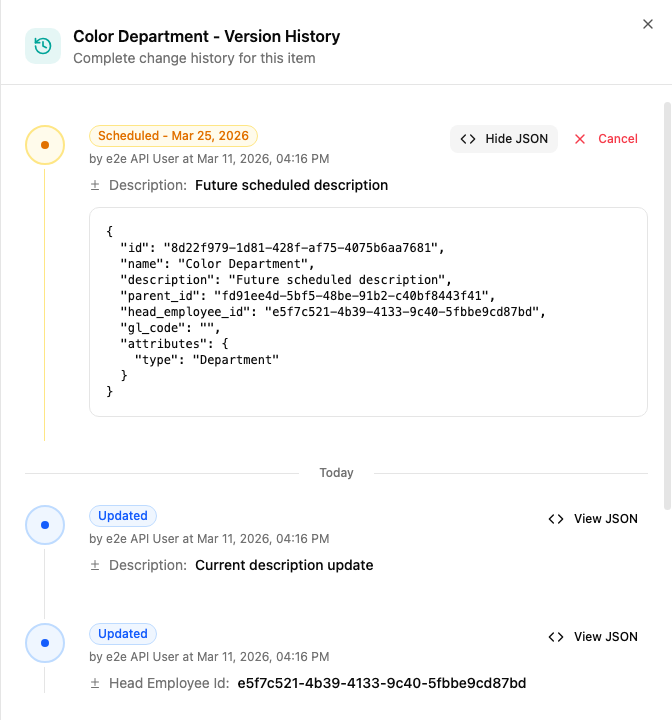
Reviewing changes
Click View JSON on any entry to see the exact changes that will be (or were) applied.

Cancelling a scheduled change
To cancel a scheduled change before it takes effect:
- Open the version history drawer
- Find the scheduled change you want to cancel
- Click Cancel
The scheduled change will be removed without affecting the current state of the entity.
How scheduled changes are applied
Scheduled changes are applied automatically by a daily batch job. When the effective date arrives:
- The Apply scheduled changes job runs (typically daily at midnight)
- All changes scheduled for that date (or earlier) are applied
- The entity is updated to reflect the new values
- The change moves from “scheduled” to “applied” in the version history
For more details, see Apply scheduled changes.
Retroactive changes
Retroactive changes let you apply updates with a past effective date. This is useful for:
- Correcting historical data
- Applying changes that should have been made earlier
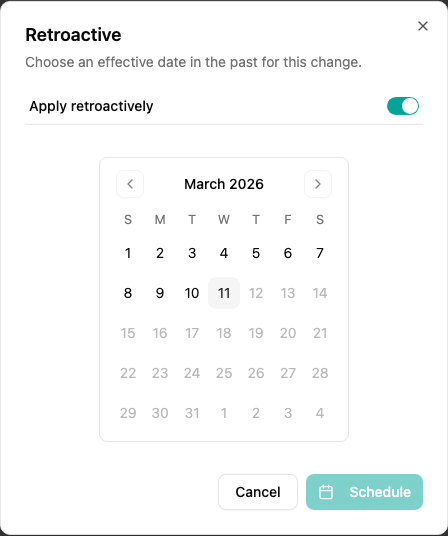
Making a retroactive change
- Open the entity you want to change
- Make your changes in the form
- Click the dropdown arrow next to Save
- Select Apply retroactively
- Pick the effective date from the calendar (up to 90 days in the past)
- Click Apply retroactive change

Current limitations
Retroactive changes are recorded in the version history but currently have limited effect on calculations. Future versions will use retroactive data for:
- Historical reporting
- Recalculating time-off accruals
- Adjusting past period calculations
For now, retroactive changes primarily serve as an audit trail and preparation for reporting features.
Identifying retroactive changes
In the version history, retroactive changes are marked with a purple “Retroactive” badge to distinguish them from regular updates.
Timeline example
Here’s how changes appear in the version history for an organization unit:

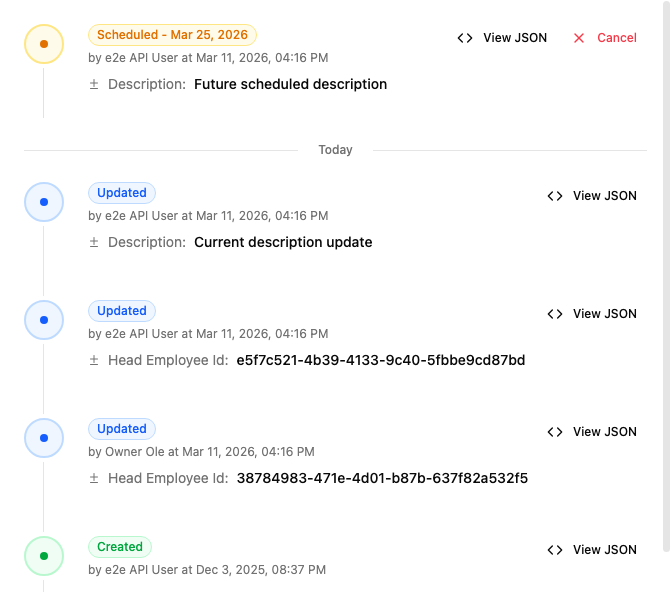
This example shows:
- A future scheduled change — Will be applied when the date arrives
- Today’s applied change — Currently in effect
- A past retroactive change — Applied with a historical effective date
Changes are displayed in chronological order by effective date, making it easy to understand how an entity evolved over time.
Permissions
| Action | Required permission |
|---|---|
| Schedule future changes | Edit permission for the entity |
| Apply retroactive changes | Edit permission + “retroactive” permission |
| View version history | View permission for the entity |
| Cancel scheduled changes | Edit permission for the entity |
Administrators can enable retroactive permissions through role configuration.