Data import
Bring data from a previous export back into a workspace — either to merge configuration from another environment, or to restore a workspace to a known state.
Overview
A data import takes a ZIP produced by the Data export tool and applies it to the current workspace. Two questions shape every import:
- How to apply the file — pure addition (Merge) or full replacement (Restore)
- What to read from the file — the whole archive (All), only configuration entities (Config only), or only employee data (Data only)
The import runs through a 4-step wizard so you can review exactly what is about to change before committing. Validation runs first; nothing is written to the workspace until you confirm at the Review step.
Modes and scopes
| Mode | What happens |
|---|---|
| Merge | Imported entities are added to the workspace. Existing entities with the same ID are updated; entities not in the file are left alone. |
| Restore | The workspace is reset to match the file. Entities present in the workspace but not in the file are removed for the selected scope. A safety backup export is taken automatically before the restore runs. |
| Scope | What is read from the file |
|---|---|
| All | Every entity type in the archive |
| Config only | Configuration: org units, employment terms, activities, accounts, policies, holiday calendars… (no employees, events, balances) |
| Data only | Employee data: employees, time events, balances. Configuration is left untouched and must already exist in the target workspace |
Opening the list
Go to to see existing imports.

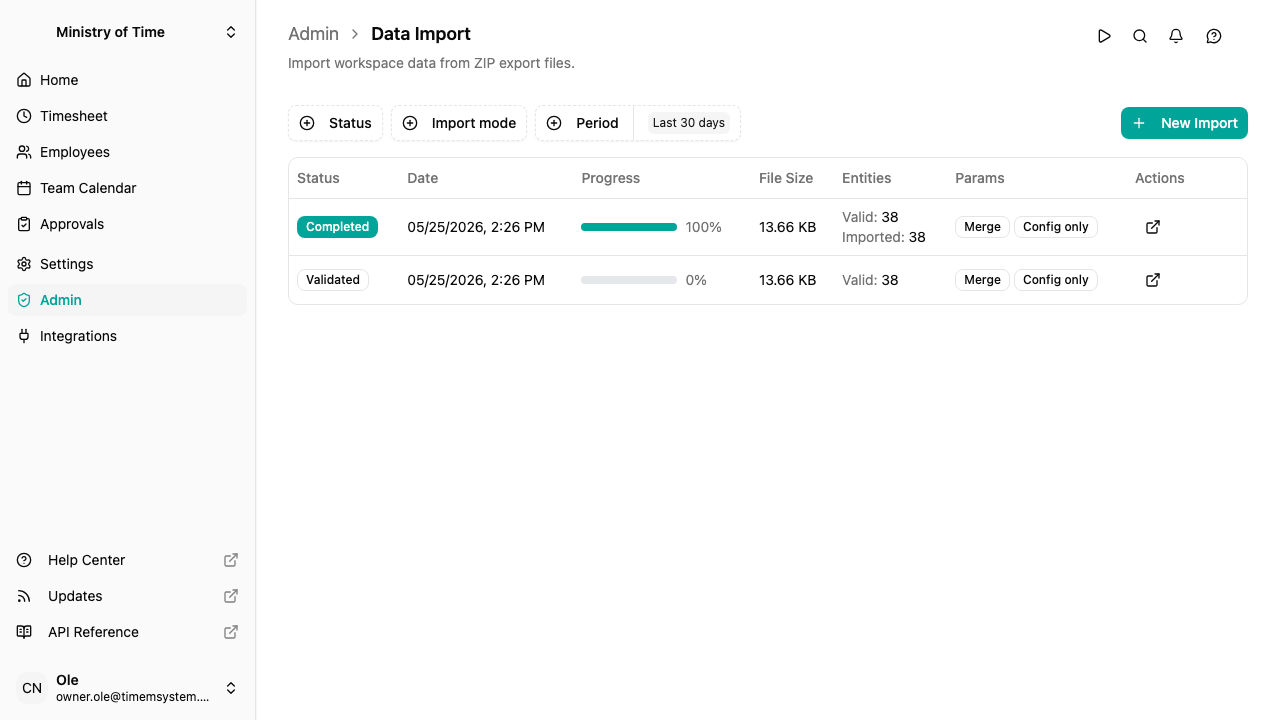
The list is filtered by:
- Status — Pending, Uploading, Validating, Validated, Processing, Completed, or Failed
- Import mode — Merge or Restore
- Period — Last 30 days by default; switch to custom for a specific range
Each row shows the current status, when the import was requested or completed, a progress bar, the uploaded file size, a count of valid and imported entities, and the mode/scope used. Click New Import to start the wizard.
Running an import
Click New Import to open the wizard. It has 4 steps that you walk through in order — you can come back to any earlier step until you press Run.
Step 1 — File

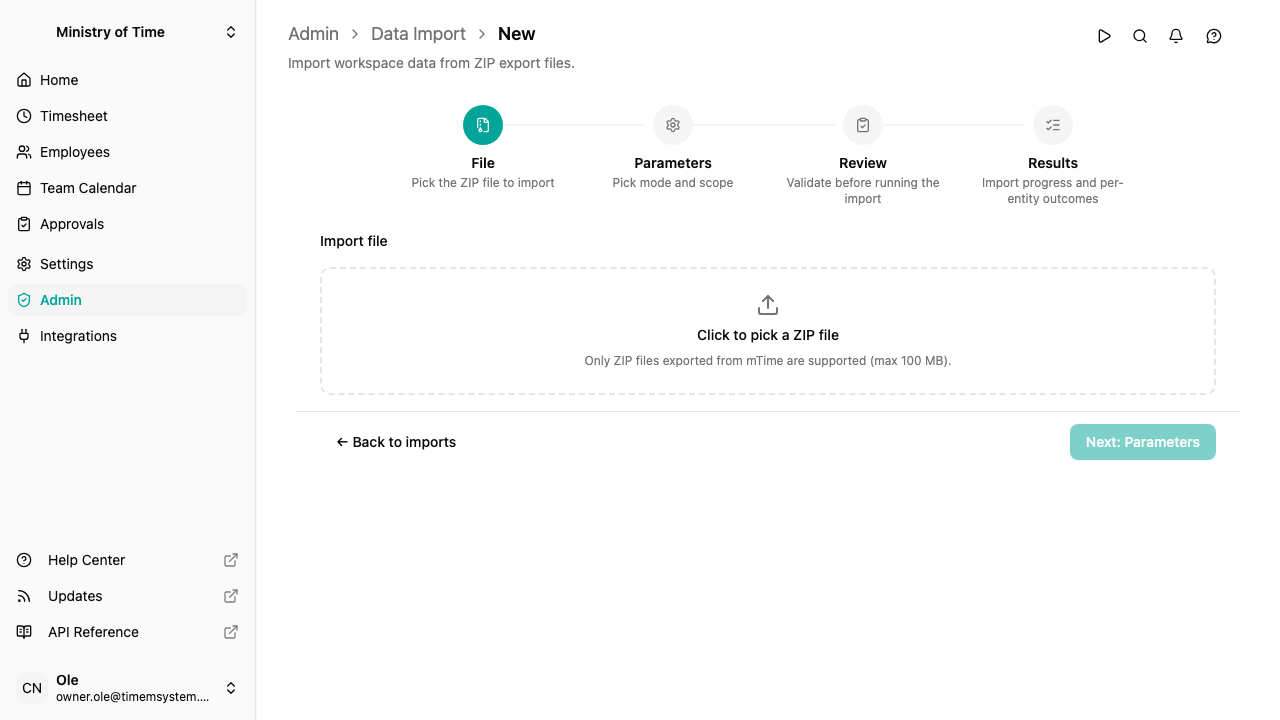
Click the drop zone and pick a ZIP file produced by Data export. Only ZIP files are accepted, and the maximum size is 100 MB.
Click Next: Parameters to continue.
Step 2 — Parameters


Choose the Import mode (Merge / Restore) and the Import scope (All / Config only / Data only). The choices stay editable until you press Run on the Review step, so you can come back here to try different combinations.
Click Validate . The file uploads and validation runs against the chosen mode/scope — nothing is applied to the workspace yet.
Step 3 — Review
The Review step is the safety check before any change is written. Validation runs server-side after upload; while it’s in progress you’ll see a spinner. When it finishes, the per-entity outcomes are summarized.

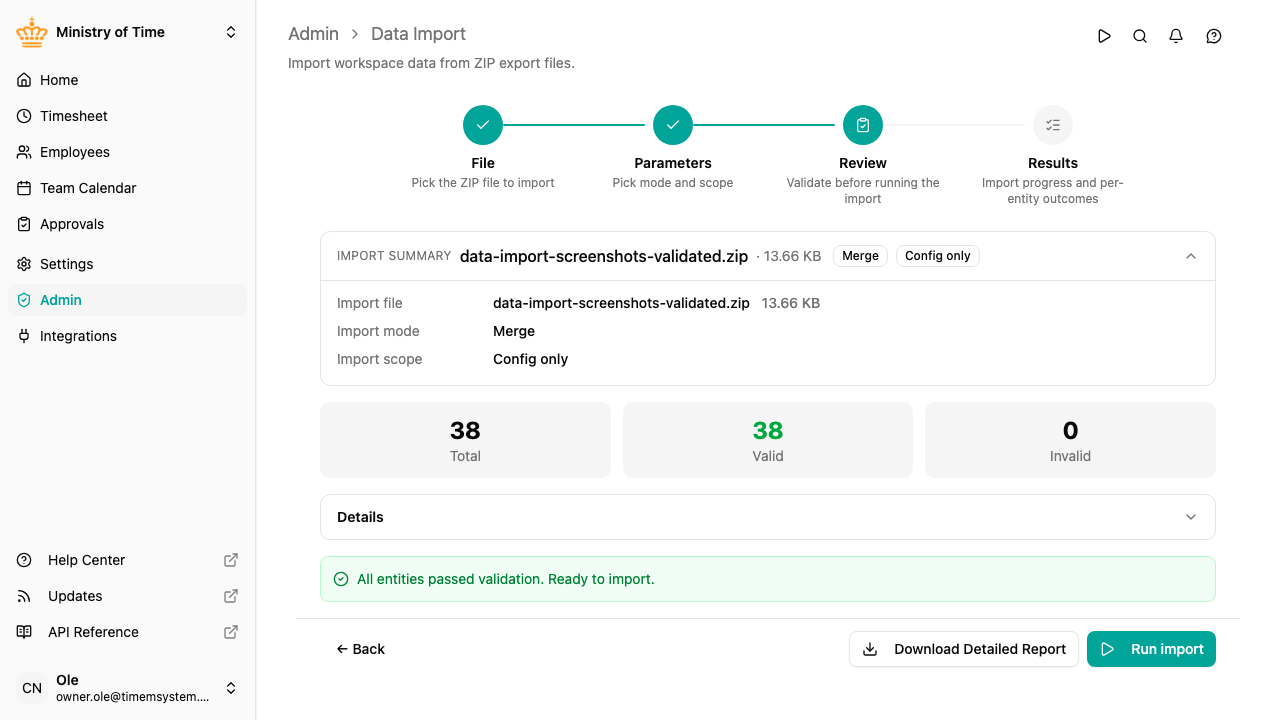
- The Import summary card at the top recaps the file name, size, mode and scope.
- The three counters show the total entities found in the file, how many would pass validation, and how many are invalid.
- The Details panel folds out a per-entity breakdown — open it to see how many records each entity type contributes and to drill into specific validation errors.
- Download Detailed Report exports the validation outcome as JSON.
If anything fails validation, fix the source file or change the parameters and re-run validation — you don’t need to re-upload as long as the file is still on the server.
When you’re ready, click Run import . A confirmation dialog appears:
- Merge asks for a single confirmation.
- Restore is destructive, so you must type
RESTOREto confirm. The pre-restore backup export is created automatically before any data is touched.
Step 4 — Results
Once the import starts, the wizard switches to the Results step and streams progress as each entity type is processed.

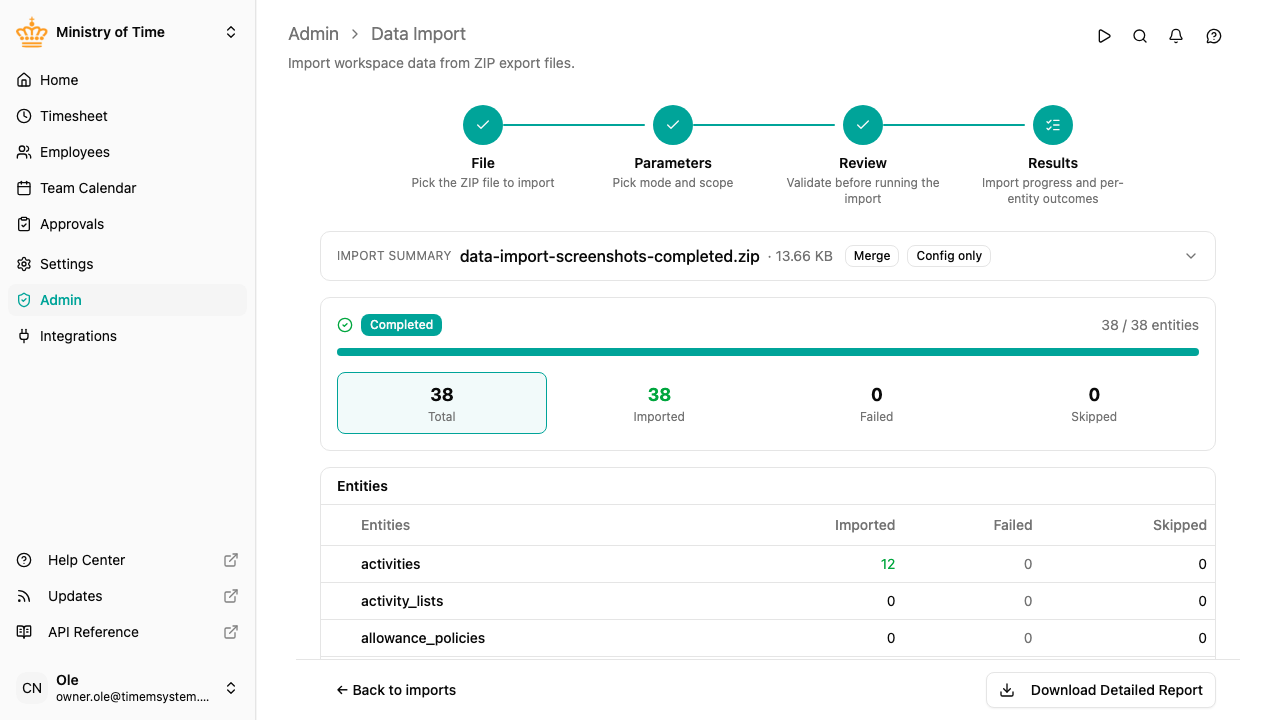
The progress bar tracks completion. The four counters break the outcome down:
| Counter | Meaning |
|---|---|
| Total | Entities the import attempted to apply |
| Imported | Created or updated successfully |
| Failed | Rejected during apply — see the Entities table for the breakdown per type |
| Skipped | Not applied because they were already in the same state (idempotent re-import) |
The Entities table lists the per-type outcome. Use Download Detailed Report for the full JSON report if you need to share results or debug a failed row.
If the import fails, the workspace is left in whatever partial state was reached. For a Restore, you can recover via the pre-restore backup — it appears in the Data export list and can be re-imported through this same wizard.
After completion
Completed imports stay in the list for audit. Open any past import to revisit the Results step — counters, per-entity breakdown, and detailed report stay available.
Iterating without re-uploading
If validation flags an issue caused by the wrong parameters (e.g. Config only when you meant All), use Back to return to the Parameters step, change the values, and click Validate again. The file already on the server is re-validated against the new parameters — no need to re-pick it.
To pick a different file altogether, go back to the File step and choose a new one. The previously uploaded file is replaced when you re-validate.
Permissions
Running data imports requires the import permission. Restore mode is allowed for the same permission, but the pre-restore backup needs the export permission to be created.